
I finally started on the twin size quilt I’m making for Elise. I’m still very much a beginner, but I thought it might be fun to document the progress here, breaking it all down for anyone interested in the quilt-making process.
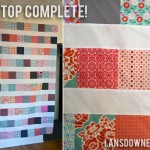
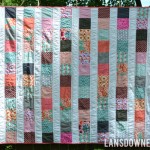
It took me a long time to figure out what sort of design I was doing, but I think I was mostly putting too much pressure on myself to make the perfect choice. Once I let go of that, things got rolling. I decided on a stripey design of alternating patchwork and solid rows. I’d show you my sketch, but it’s literally a drawing of horizontal stripes.

I cut 120 six-inch squares for my patchwork rows, many from the fabrics I showed you before, but I also added a few more prints from a recent trip to a cute new local fabric shop (Fabric Nosherie in Webster Groves) and my fabric stash to round out the color palette. I got all of the pieces cut for the top (including some solid strips not shown here) in about 3-4 hours.

And then it took about an hour to lay all the patterns out in a way I liked. There will be solid strips between the patched rows, but I plotted everything out without them. And that was when I realized the quilt is going to be freaking huge. I mean, I know it’s a twin size and I know the final dimensions, but seeing what I had laid out on the floor and knowing it was only going to be bigger was kind of intimidating.
So that’s where I’m at now. Next step: assembling the quilt top.
I set myself an artificial deadline of April 26 (Elise’s birthday) for completing the whole thing, but I’m not sure how realistic that really is with everything else I have in the works. I might not make it! Stay tuned.
——————-
Other posts in this series:
1. Planning and cutting
2. Assembling the quilt top
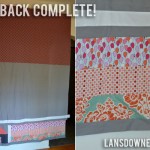
3. Assembling the quilt back
4. Quilting
5. Binding
6. Finished Quilt


So pretty! Can’t wait to see the end result!
Thanks, Jodi! I can’t wait to see it either!
How much of each fabric did you use?
Hi Jenna,
I’m not exactly sure since this was so long ago, and I used different amounts of each print. You can get anywhere from 12 to 18 six-inch squares from a half yard depending upon how much the fabric shrinks when you wash it, how straight the cut of fabric is along the edges, etc.
Hope that helps!