Are you ready? This is my last “progress report.” The quilt is complete and I’ll have all the “beauty” shots in the next post. I hope all of you non-quilters have enjoyed this peek into my world as a novice quilter. And I hope any experienced quilters out there didn’t laugh too hard at my beginner-level skills.
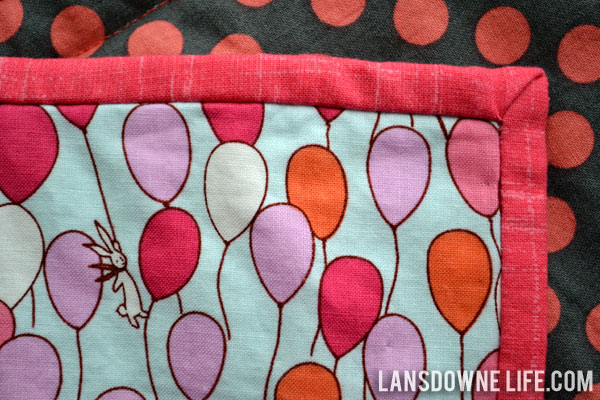
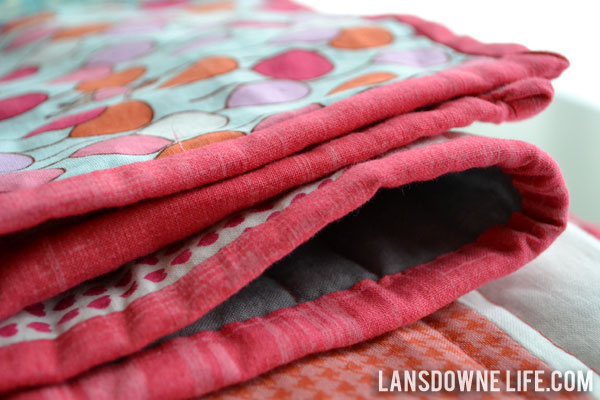
But there’s one last step: binding the quilt. I really love how binding finishes everything off. It’s like a frame around the quilt.

First, I took a few minutes to trim up the edges, making sure everything was straight and square. Then it was time to create the binding.
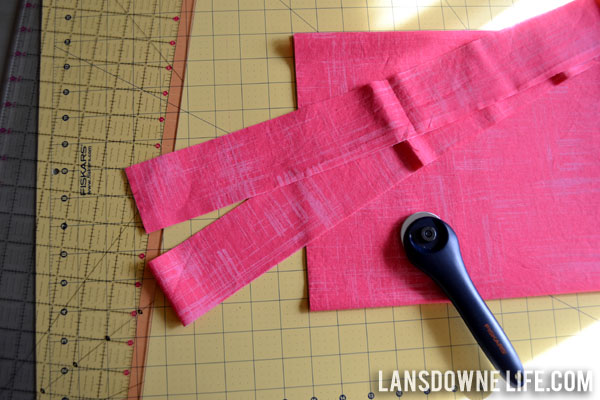
It took 15-20 minutes to cut the fabric strips and then about an hour to sew them all together and press the long strip in half.
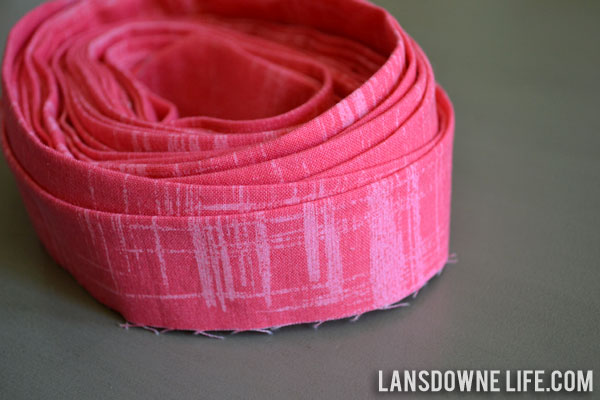
When all was done, I had a long, nearly 10-yard strip of pretty binding ready to sew onto the quilt.
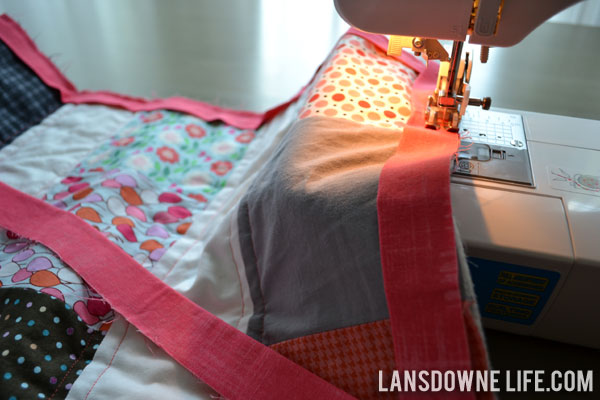
It took about 50 minutes to attach the binding along the edges of the quilt with the sewing machine. Then I wrapped the binding around the raw edge and broke out the needle and thread to finish the binding by hand on the other side. Those barrette looking things are called binding clips and they help hold everything in place while stitching.
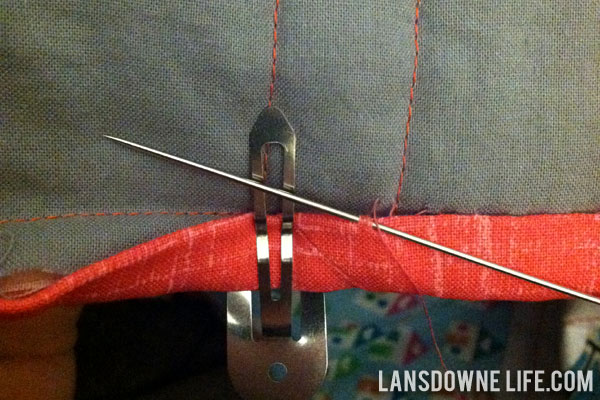
Finishing by hand takes a super long time, but it’s something you can pick up and drop at anytime. It took eight hours to hand stitch the binding around the perimeter of the quilt (a total distance of about 8.25 yards).
As I was adding up all of the little bits of time I had jotted down, I realized it seems absolutely crazy to spend eight hours on finishing the binding alone. That’s more time than I spent on the quilt top!
BUT, two things:
- On my previous two quilts, I spent a LOT of time ripping out sloppy machine stitches from finishing the binding with the machine. For my last baby quilt, I actually started with the machine and then ripped out the machine stitches and switched to finishing the whole thing by hand. I’m learning. Doing things and re-doing them is definitely not an efficient use of time.
- Hand sewing is something you can do mindlessly while watching TV. And it’s sort of therapeutic / meditative. In this case, it helped me decompress from frustrating days of potty training boot camp. (Ugh.)
Total time spent: About 27-28 hours.
Next up: The big reveal!
——————-
Other posts in this series:
1. Planning and cutting
2. Assembling the quilt top
3. Assembling the quilt back
4. Quilting
5. Binding
6. Finished Quilt