
Onto part two of my landscaping intervention!
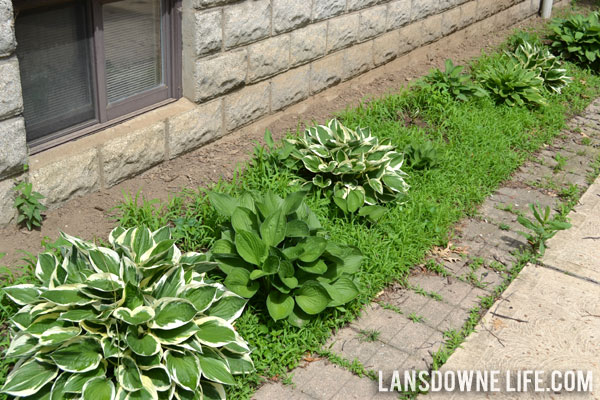
Um… you can see why it needed an intervention. My hostas are doing awesome, actually, but you would never notice because the weeds were stealing all the focus.
This is an area I don’t see everyday, or even every week. I have to make a special effort to go see it. It’s out of sight/out of mind and tends to become overgrown with weeds. Like, this overgrown or worse. (Take my word for it. Much worse.)

Mulch would help, certainly, but as I noted before, this area is large (4 x 36 feet) and would probably require something like 12 or 15 bags of mulch. For just this area. To me, that’s a lot of wasted money, effort and time every year, especially for a space that we don’t really get to enjoy.
My overall landscaping goal is to make everything as low maintenance as possible and it doesn’t get any more low maintenance than rock. Well, concrete, I guess, but who wants more concrete in their life? Rock it is.

First, I needed to clean things up. A couple of hours pulling weeds and it was looking better already.

I went with bagged rock from Lowe’s. I’m not sure if this was the cheapest way to go; I didn’t look into alternatives like a load of rock from a landscaping materials place. We don’t have a place to dump a load of rock that wouldn’t require hauling it around the entire house. It just didn’t make sense in this situation. We ended up with 35 bags of rock at $3.58 each, so with tax, just around $125 total.

I added the curve of flagstones for some added visual interest, and to remedy one area where water spills over from the gutters during heavy downpours and erodes the soil. You can see how the dirt has splashed up onto the house in that area. (The gutters are clean and we have screens to keep out gutter clogging junk. It’s just weird roof design and I’m not sure there’s much we could do about it.)
So with a couple of stones placed just so, I worked them into a larger curving design so they wouldn’t look like islands floating in a sea of gravel.

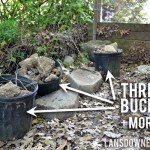
But I’ll let you in on a little secret. The real reasons I used the flagstones at all were because a) we already owned them. They were all salvaged from underneath the broken concrete in our backyard. I am all about using what you already have. And b) working them into the landscape cut down on the amount of rocks we had to buy. I can’t begin to guess by how much, but certainly a significant percentage.
Dan and I started spreading the rock, but soon realized we needed some type of edging to keep the rocks from spilling into our neighbor’s driveway. The project grows!
Plastic edging was about 75 percent of the price of concrete edging pavers. This area has a high probability of getting stepped on and given that it’s so close to the neighbor’s driveway, it even has the possibility of being driven on (accidentally, of course). I went with the long-term solution: concrete pavers.

These are not actually “edging” pavers. They are 6×9 inch stones meant to lay flat, but they were the right color and the right price and real edging pavers are similarly 5-6 inches in height. They were also from Lowe’s for 81 cents each (just over a dollar per linear foot). I bought 48, so $42.55 with tax for all.

I dug a narrow trench with a flat shovel and laid the stones lengthwise. It probably took 2-3 hours to do the whole line of them (completed in multiple sessions). After all the edging was in, I spread the rest of the rock in a thick layer (probably 2-3 inches). And done (finally)!

It looks a thousand times better, and I no longer feel like a bad neighbor! It’s not perfect or professional-looking, but at least it looks like I’m trying. Considering that this area was bare dirt when we moved in four years ago, we can call it progress.

I am already discovering this is not a fool-proof way to keep out weeds. They just keep coming no matter what you do! But now maybe a five-minute weed-pulling session every week will be sufficient.


Hi, I was researching “hostas in rock flowerbed” and found this! This is exactly what I want, but you mentioned the weeds. I’ve seen multiple posts on Pinterest about how laying down layers of wet newspaper and then the rocks would’ve kept the weeds out. And the newspaper dissolves after 18 months and by that time the weeds in the soil have died already anyways! Just a little FYI for if you ever get tired of the weeds. :p
Thanks for the info. The weeds now are pretty minimal. Like, maybe ten baby weeds every couple of weeks in this long bed. So much better than where I was before!