I’m finally finished with the bench makeover, but the process was not without a few mishaps.

As a reminder, this is what the bench looked like when I bought it. (Well, this is the product photo from HomeDecorators.com. I didn’t actually assemble before painting.)
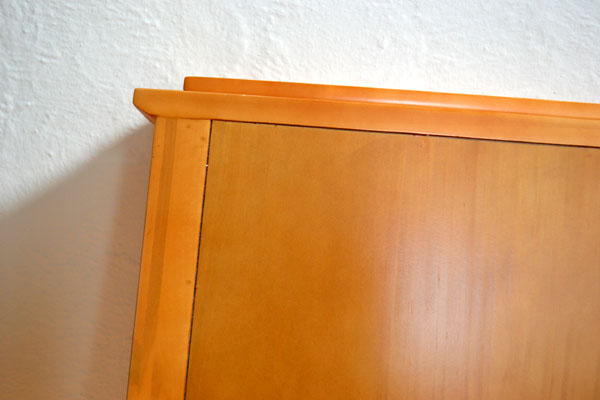
In real life, the wood was even orangier than I expected. Luckily, I never intended to use the bench as it was; I wanted to add a painted piece because there’s enough stained wood in the room already.
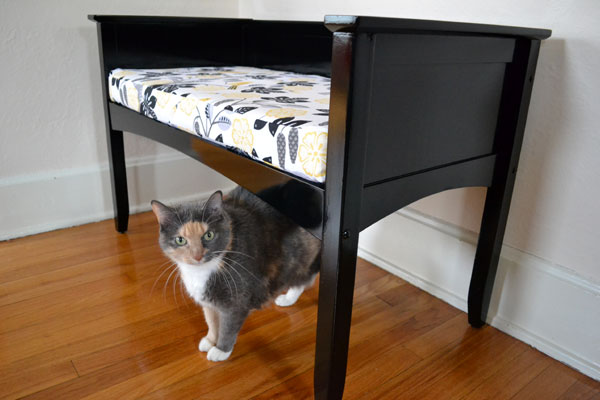
I decided to use spray paint rather than regular brush-on paint because I thought it would be a quicker process, but I have to admit, in the end, it really wasn’t.

The bench came unassembled, so I opted to forgo putting it together and just paint the pieces. First, I hand-sanded all the surfaces with a fine grit (220) sandpaper. Then I primed them with a white spray primer. (On one of my subsequent visits to Lowe’s I noticed they have gray tinted spray primer, which might have been a better choice when painting black. Oh well, next time.)
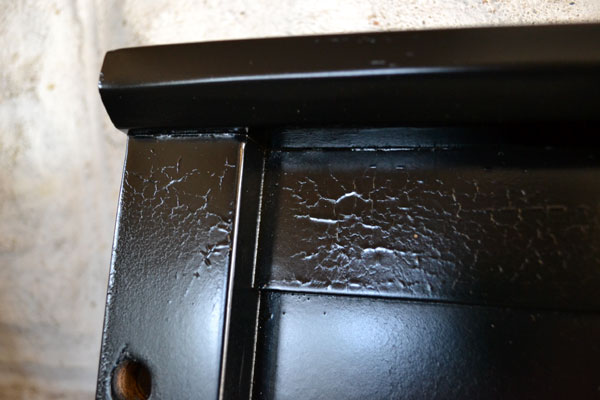
After the primer was dry, I started painting. Midway through the process, I got a little anxious and sprayed too thick. This lead to some crackling. Ugh. I was able to sand most of those areas smooth (or smooth-ish, at least). Mainly I was annoyed because I had to buy a third can of black spray paint when I probably could have gotten away with only two cans if I hadn’t had to sand and repaint.
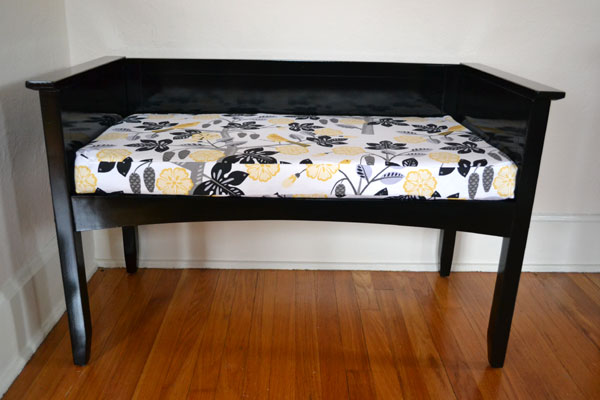
Upon assembly, I discovered I had missed a couple of edges, so I had to get a fourth can of spray paint. I only used a bit of it for the touch ups, but yeah, annoying. After all was dry, I gave it a couple coats of polyurethane. I hadn’t planned on that, but I thought it would be best for long-term durability. And with a water-based polyurethane, it’s super easy and quick to do. The finish is a little more mirror-like than I expected, using a satin finish polyurethane.
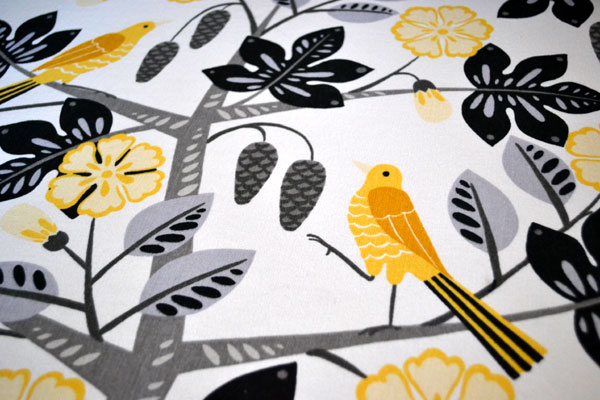
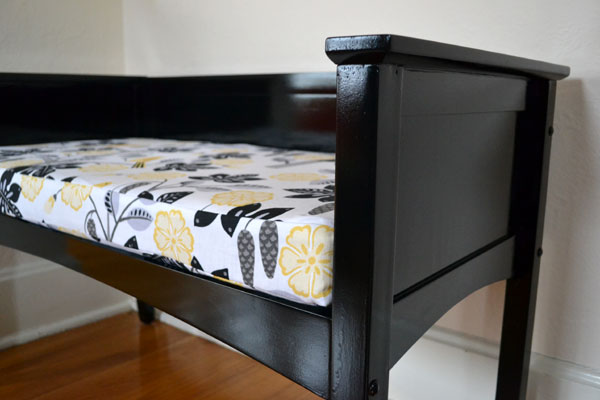
The bench came with a cushion, but it was plain white and the fabric looked kinda cheap. I didn’t think that would last all that long at toddler level, so I bought this pretty Waverly home decor fabric and decided to make a slipcover.
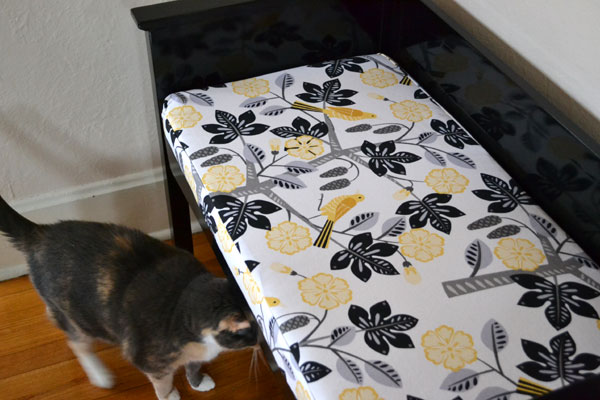
I bought the cording to make my own piping, but then realized I didn’t have enough extra fabric. I left out the piping altogether, and I’m so glad I did. This slipcover was such a pain. Never again! Being a beginner-level sewer, it was really difficult to make a cover that would fit snuggly on a pre-existing piece of foam. (That’s one reason I fill all my pillows with loose filling and don’t use forms.)

I fumbled through, but all my corners are wonky. If you come over, just pretend you don’t notice, thanks. I’m not sure what makes me think I can do some of this stuff. The one bright spot of making the slipcover was that I learned how to sew a zipper (using Prudent Baby’s tutorial) and did it perfectly and without a hitch.

Here is the bench in its natural environs. I think it fills the space pretty well and gives that side of the room more weight.


Thank you so much for posting this!
I am about to start refinishing an antique dresser for my soon-to-come baby girl, and I have been searching online what to do, and it’s been the most difficult of searches. This comes the closest to same materials, etc.
I feel more confident now, thanks!
Glad to be of help! Make sure you wear a mask if you are spray painting. And don’t skimp on the primer.
I didn’t mention the paint I used in the post, but I use Valspar because it dries in an hour! So great!
Let me know if you have any questions!
P.S. one thing I discovered recently is Google blog search. It’s been really helpful in finding actual projects by real people. Hope that helps too!