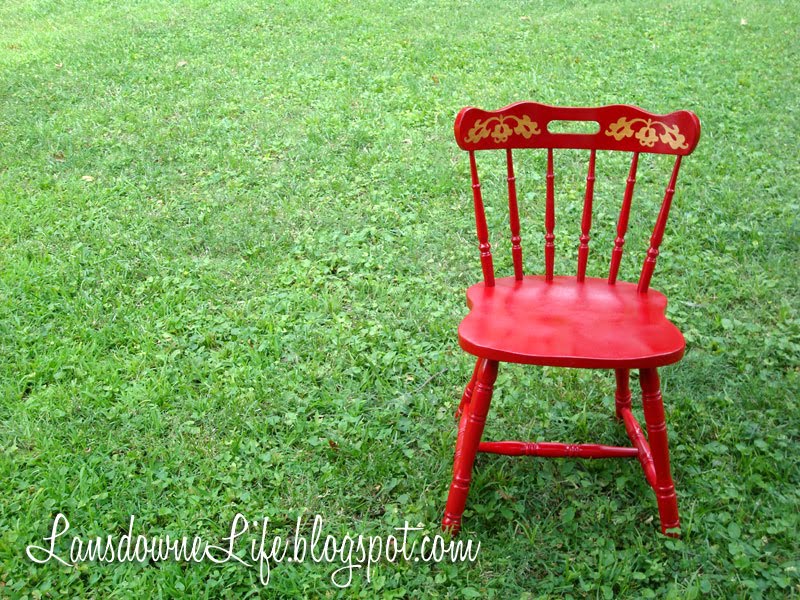
These 70’s dinette chairs are pretty common. In the two days since I painted mine, I saw one on a porch and some more in the back of a pickup.
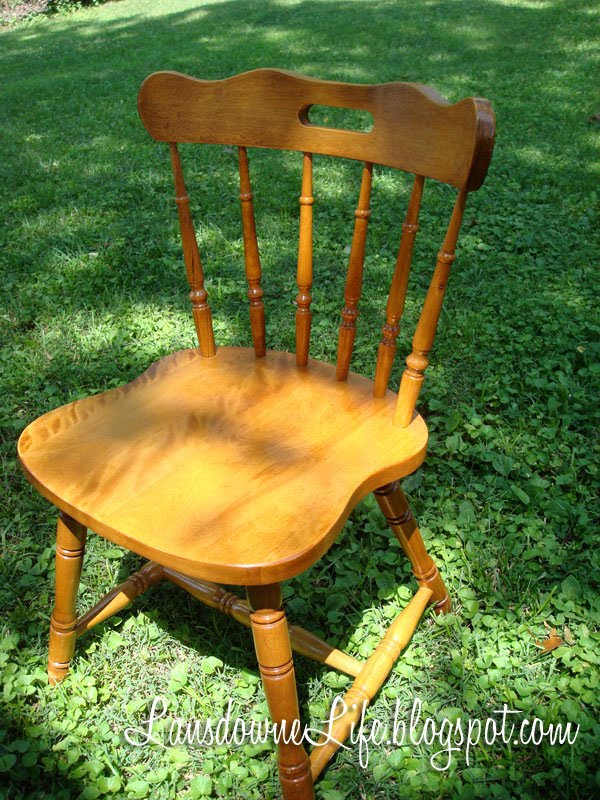
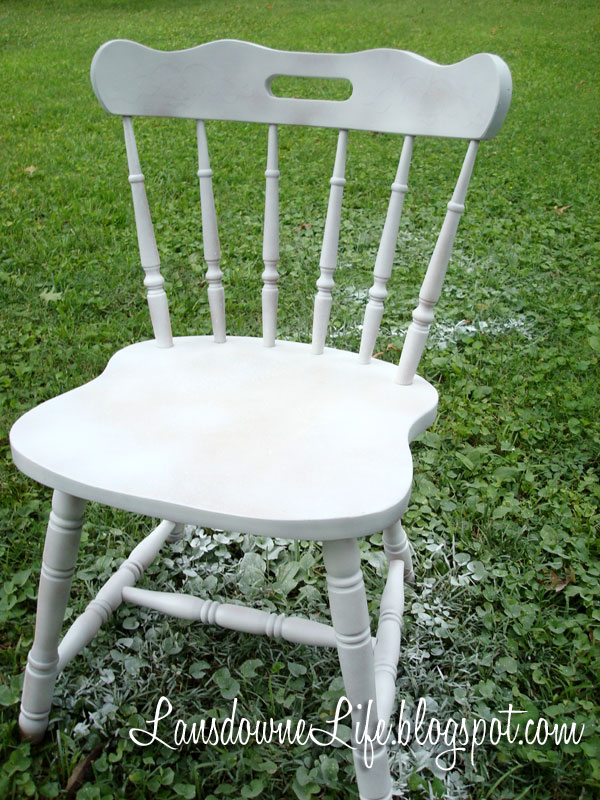
Before
Mine was a dumpster find from years ago. I have never particularly liked this chair, but I kept it around because a chair’s a chair. And you can always use an extra chair.
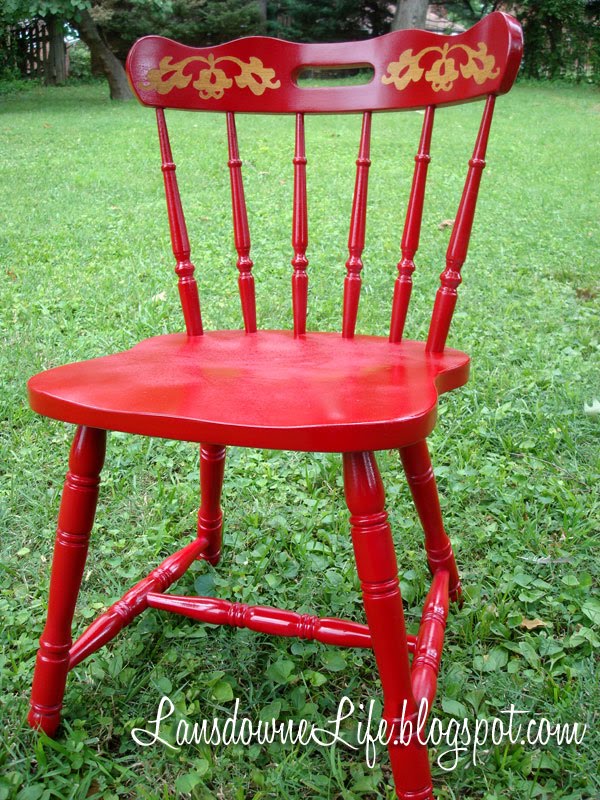
And it just so happened that we needed another chair in our office. The room is kind of dim and there’s a lot of dark brown going on, so I thought I would give it a snappy paint job in a bright color. If a quick makeover couldn’t sway my affections, then nothing could.
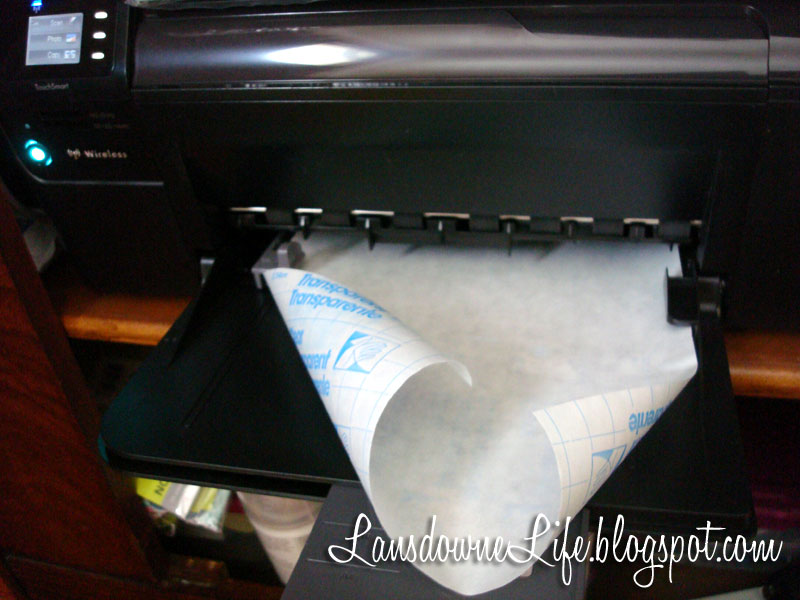
I wanted to give the chair just a little detailing, so I made some stickers from contact paper to mask off parts of the original finish. I had been brainstorming about printing on contact paper and broke my own rule about not sending things with adhesive through my newish printer. (It’s OK; the contact paper is pretty well stuck to the paper backing, unlike adhesive labels.) If you have a die-cut machine, this technique will be of little use to you. But for those of us without one, this is an easy way to create custom stickers from contact paper.
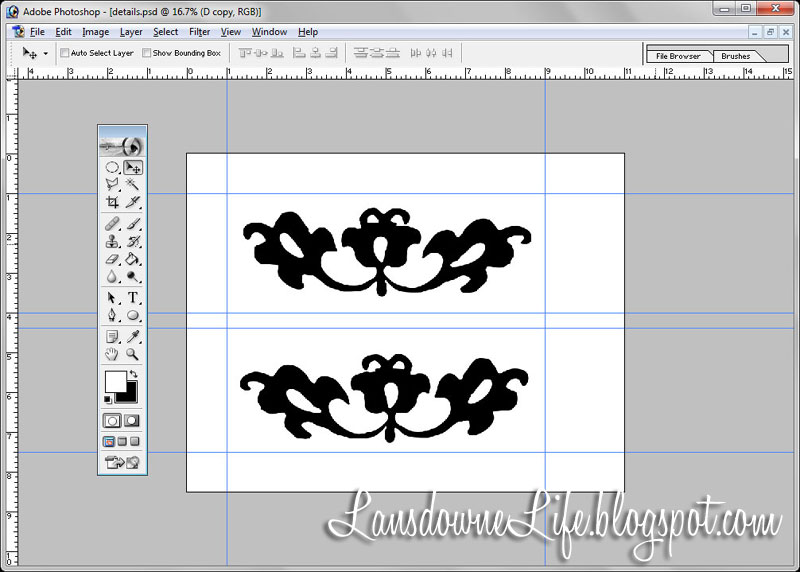
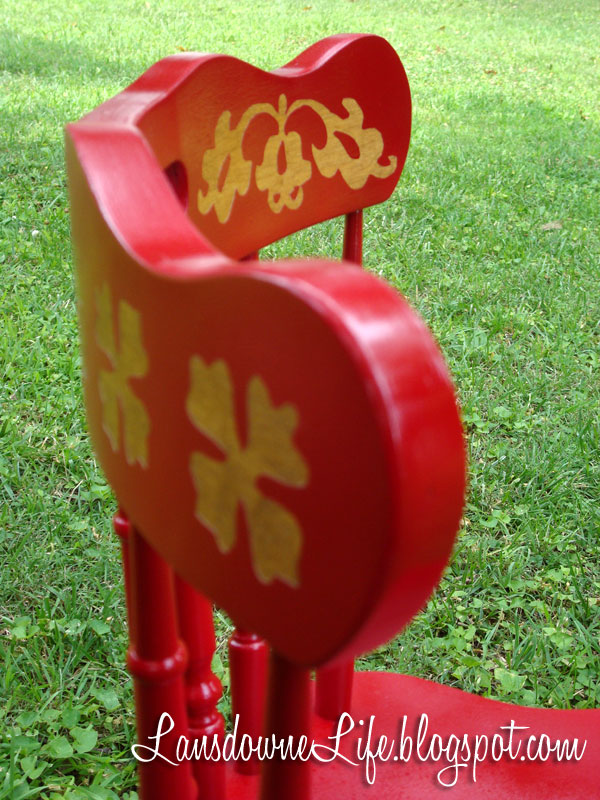
I found a shape from a dingbat font called Fell Flowers 2 and enlarged it to fit a space on my chair.
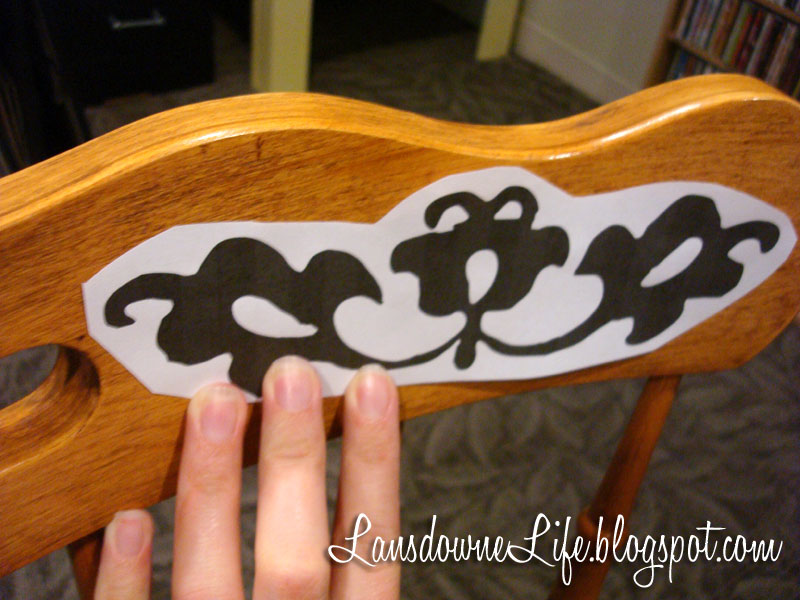
I did a test print on regular paper and did a rough cut around the shape and sized it up on my chair.
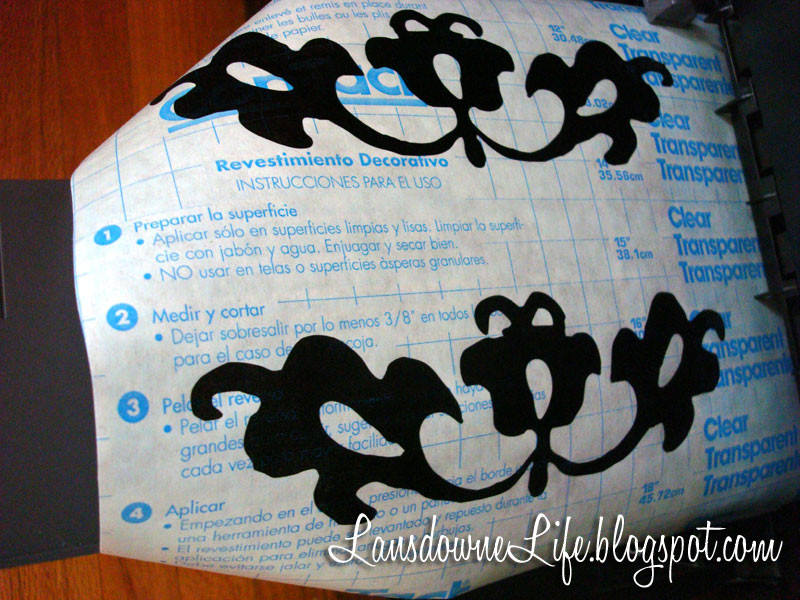
Then I printed the design on the contact paper backing. I didn’t print on the contact paper itself because I imagine that would have been a smeary mess. It is important to note that you probably should NOT do this with a laser printer as they get very hot and would probably melt the contact paper.
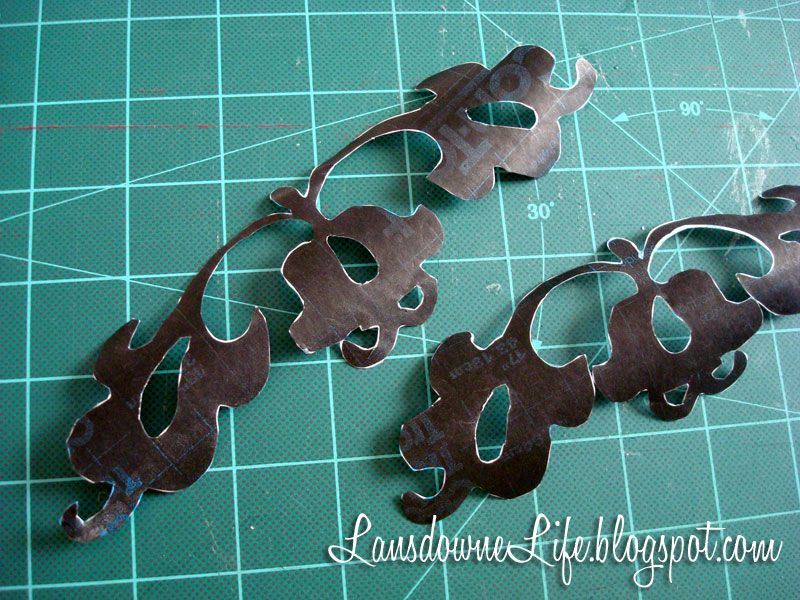
I carefully cut out the shapes.
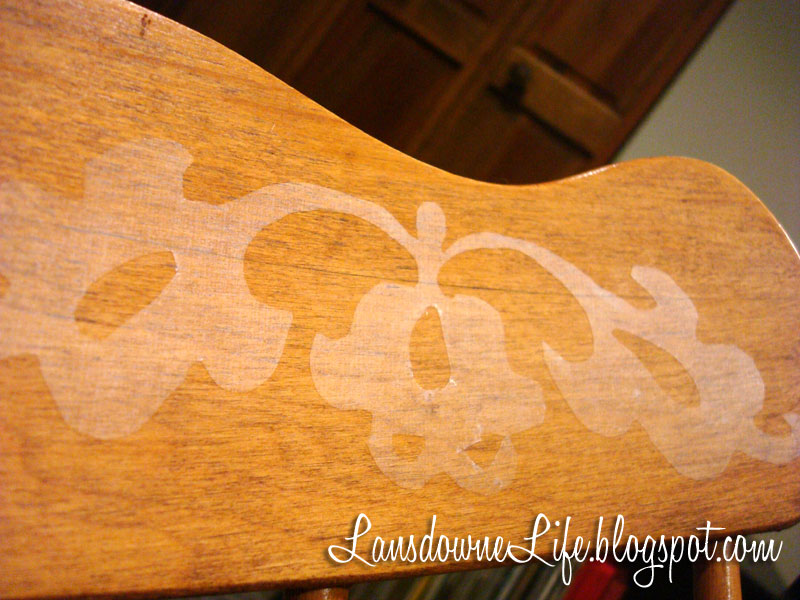
After cleaning the chair, I removed the paper backing and placed the stickers. I used clear contact paper, so it is kind of hard to see in the photo. I had originally planned to mask off the feet of the chair as well because I love the “socks” look on furniture, but they were a bit dinged up and needed to be painted.
This was my first time using a spray primer. Are they all that spattery? Yikes!
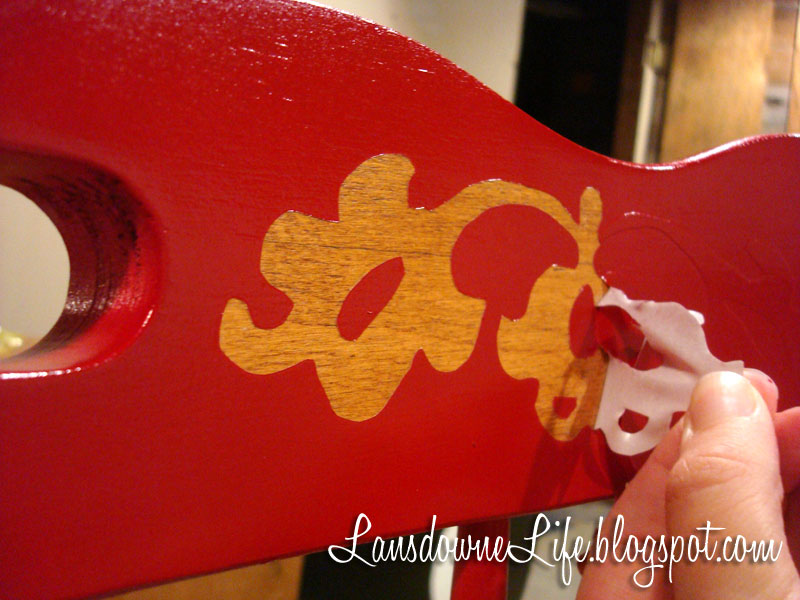
It’s OK, though. The red spray paint pretty much covered the spatter dots. After the chair was dry to the touch, I carefully peeled off the stickers.
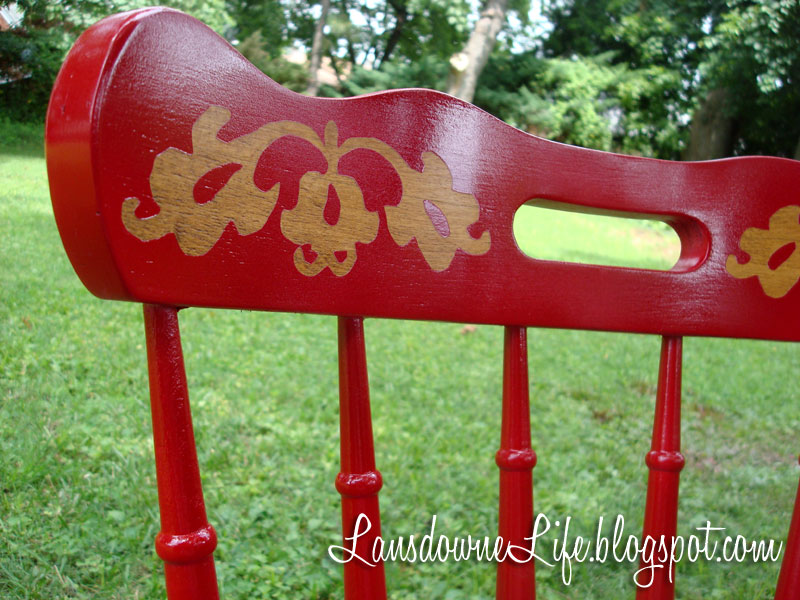
Doesn’t it look cute? I’m really happy with the way it turned out. It doesn’t feel as frumpy anymore.
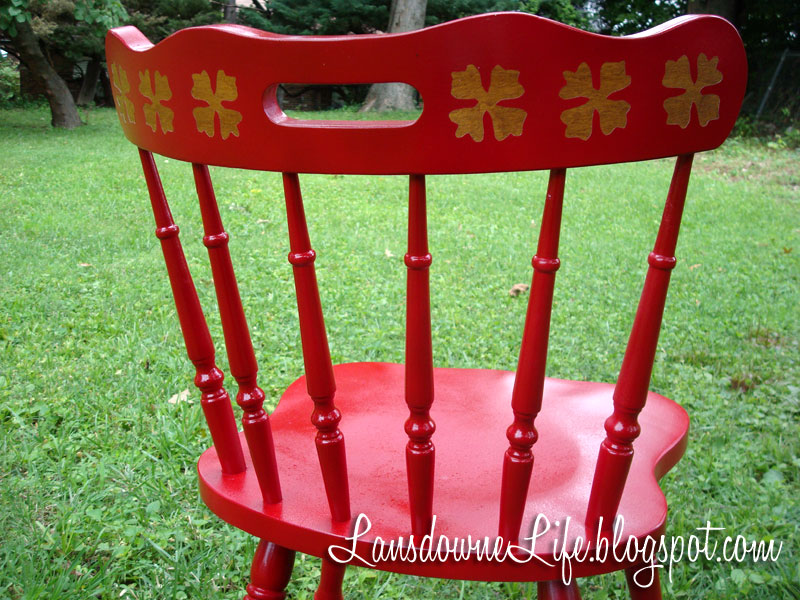
I’m going to give the seat and the back a coat or two of clear polyurethane to seal them, but not the spindles or the legs because I fear it would be a nightmare of drippiness.
So why the “Heidi” chair? I haven’t read Heidi since grade school and I honestly don’t remember much about it. But something about those flowery shapes, the spindles and the red strikes me as very folk arty. The name “Heidi” popped into my head and wouldn’t let go. So I went with it.


wow the power of spray paint! love it! i can imagine a bunch of these chairs painted different colors around a large table!
thanks for sharing, come stop by my blog, im hosting my first giveaway!
i think its very cute. luv the red.
I just found your blog and I had to let you know how much I love your projects. I have an old chair in my garage that I picked up for $3 at a yard sale that looks like the “before” picture of your Heidi chair. Now I know what I’ll do with it! I have clear contact paper that I didn’t want to throw away. Your idea of printing on the reverse side to use as a stencil is brilliant! Thank you for sharing!
Awesome! Good luck with your chair rehab!