
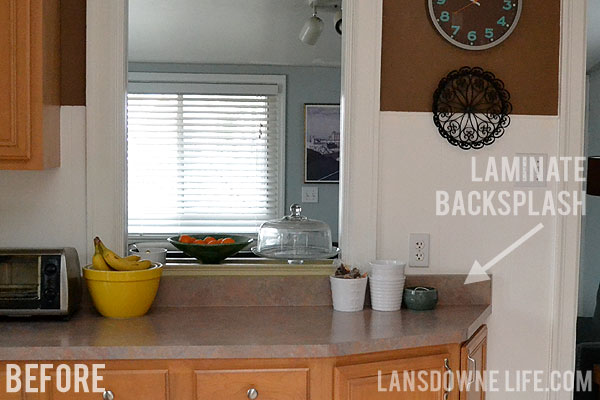
This is the story of how I took a weird problem and turned it into a design feature.
I ordered our new laminate counters without that four inch integrated backsplash so they would look a bit more high-end. But our old counters had that backsplash, and we didn’t know what was behind it.
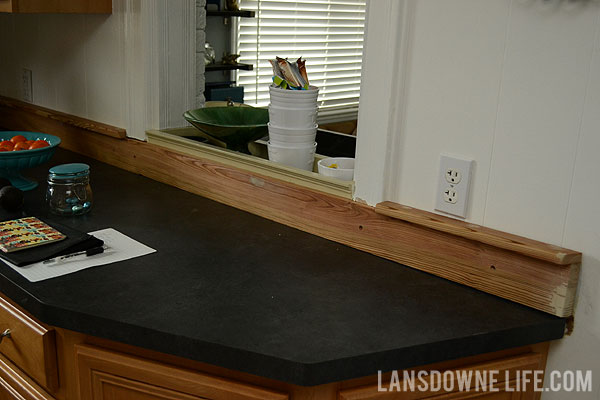
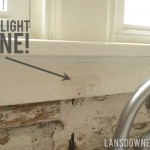
It was a risky move. I expected I would have to do some wall repair (sanding and repainting), but I didn’t expect to find this:
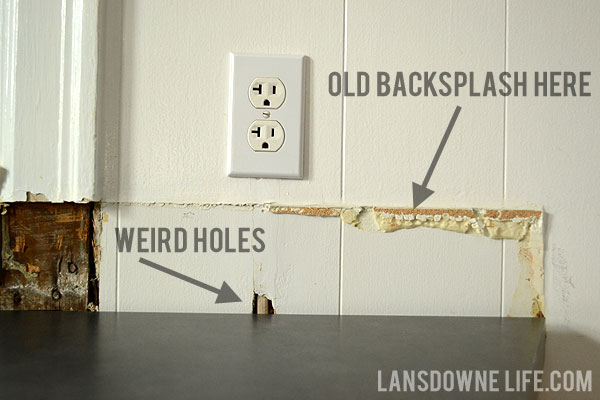
Weird holes in the paneling where the electric had been run. Under every outlet. These two walls are masonry, so the wiring isn’t really inside the wall. And that left me with these unpatchable holes.
But I also didn’t expect to find this.
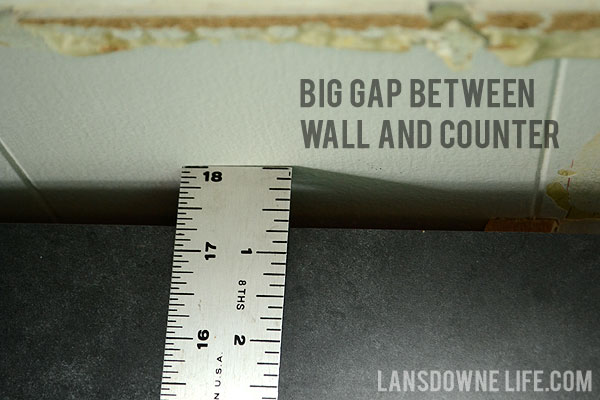
Big gaps between where the countertops and the walls were supposed to meet. Nearly three quarters of an inch in a few places! Our countertops are square, but we discovered the room is not. Ah, old house. You got us again. So even if I had been able to patch the holes in the paneling, I would still have been left with the gaps.
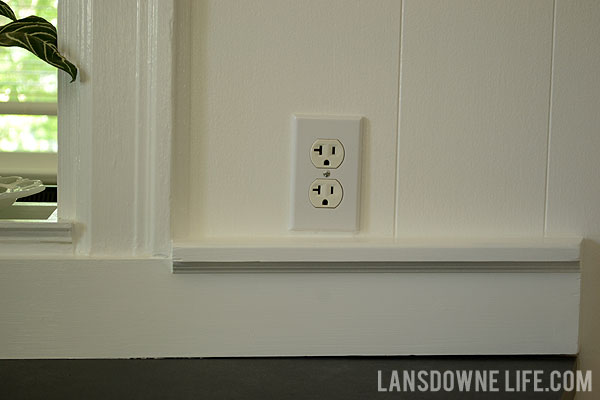
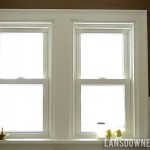
I gave it a lot of thought, looked at a lot of photos for inspiration, and adding molding was the most elegant solution I could think of to solve both issues. Maybe not ideal, but making the best of the situation I got myself into.
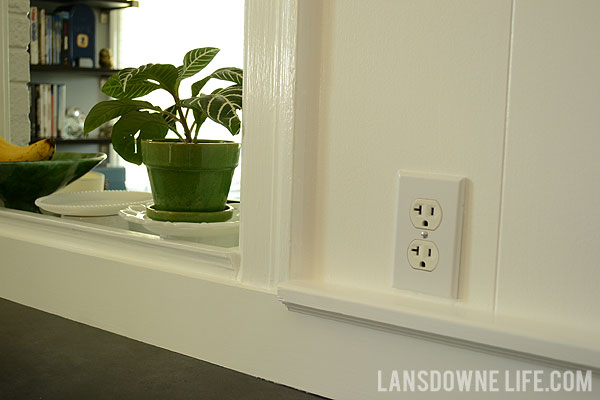
I didn’t want it to look like we were just slapping some lumber up on the wall to hide the ugly. Too obvious. So we added the decorative lip to make it look more intentional and to blend with the rest of the trim in the room.
My dad made all of this from some scrap barn wood he planed and smoothed out. (It’s the same wood he used to make our cottage style shutters too!) I think he bought the decorative trim for under the lip, but all the other wood was from his stash. After he installed it all, I filled the screw holes and painted the trim and the lower half of the walls the same shade of white (Valspar’s off-the-shelf Ultra White).
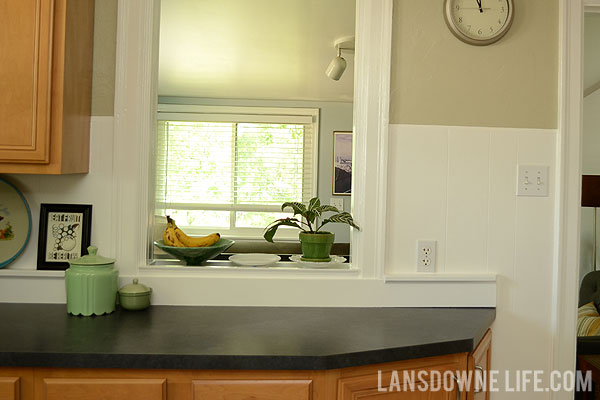
Throughout this entire process, I had my doubts. Would it look strange? Would it stick out? Truthfully, it wasn’t until I got it all painted that I was completely sold. Now it blends right in with the rest of the trim in the room. Like it’s always been there!


I agree! I think it fits in very well! Great job coming up with a creative solution.
Thanks! It’s good to hear someone else say that!
Looks awesome, and even better-unique. Do you remember the name if the color of your old laminate? It looks like ours in our new house and I am looking for backsplash ideas to lessen the obvious “updated” laminate look in our 1940s kitchen without the cost of replacing it.
Sorry, I don’t know the name of the old laminate. It was here when we moved in. It was kind of a pinkish-salmony marbled weirdness. There’s a better picture of it in this post.
Have you tried searching for 1940s kitchen photos for ideas? Sometimes looking at old photos and drawings is helpful for that kind of thing. I also love dissecting photos in This Old House magazine. Lots of ideas!
Thanks for the response! In looking more closely, yours definitely had more “pink” to it than ours which is more of a taupe/grey. (not offensive, just not in keeping with a 1940s home). I am thinking of ripping off the incorporated “backsplash” and putting subway tiles up to the bottom of the upper cabinets for now!
Hi, I love your upgrade and am doing g something Similiar now. I’ve also run into the “big ugly gap” between my counter and wall. What did you do at the end where the counter and edge of the cabinet gap are? I’m struggling with that portion and how to fill it in or cover it… Thank you!
Hi Mary,
I will let you in on a little secret; I didn’t fill the gap! In our kitchen, it’s in a pretty inconspicuous spot, and no one has ever noticed.
I originally thought I should fill it with a bit of scrap wood or something painted the same color as the counter, but it was one of those things I never got around to.