
The frame around our front door needed re-painting. The old paint was peeling and there were a handful of useless nails hammered into it and painted over. I guess they were probably used by a previous owner to hang Christmas lights. The whole thing was ugly.
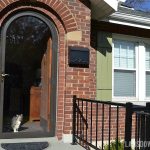
 Before
And after refinishing our front door, I thought the color needed a change too. The existing dark brown wasn’t terrible close up, but from the street, the whole exterior was looking a little blah. Too much brown!
 Before
I was just going to give it a couple of coats. A quick and easy project, right? Not so much. Upon closer inspection, I noticed the alligator skin-like texture. Someone had painted over cracked paint in the past, and while I could have gone over it with additional coats, I knew that I wouldn’t be totally happy with the results without taking off the old paint first.

This was one of the most painful DIY experiences I’ve had. Really, it sucked, and I can’t say that I ever want to do this again. Many times during this process I wished the door frame had been a piece of furniture I could have taken to one of those refinishing places where they strip it for you. I would have done that in a heartbeat and gladly paid the going rate, whatever that might be.

First I tried to sand off the paint. That was dumb and pointless. So I moved to a citrus stripper which took off the top layer, but it was messy and it took a long time to set. The results weren’t really equal to the effort in my opinion.

And that’s when the great heat wave of 2011 moved through and delayed the whole process for a few weeks. So annoying to walk past this chippy peely mess everyday, but there was no way I wanted to work on our south-facing porch in the 100+ heat.

After that, I decided to sand off some more, but after an hour and a few sheets of sandpaper, I was getting nowhere. Time to bring out the big guns. I used a serious stripper that required “chemically resistant gloves.” Anyway, this stuff will burn your skin if you’re not careful. (p.s. Latex gloves are NOT chemically resistant, as I found out.) Not really a fan of chemicals in general, but sometimes that’s the only way to get things done.

Several hours of scraping later, the paint was gone and I had a smooth clean finish. I have never been so happy to see bare wood.

I donated a pair of flip flops to the cause. They had so much junk stuck to the bottoms by the end of the process, they were trashable. Maybe I’m not the most prudent person stripping paint in flip flops, but whatever. I still have my feet.

Stripping the many layers of paint led me to discover this old strike plate. So it appears there was a storm door here once upon a time. I filled them in with wood filler, along with a lot of other random holes from nails, etc. and sanded them smooth. The drying time of the wood fill also gave the stripper ample time to evaporate completely (a day or so).

And then I was ready to paint. Finally, a fun step in this seemingly endless process! The color I chose is Woodlawn Lewis Gold by Valspar. I wanted something bright that would draw attention to the door. It’s a golden yellow color from the brick itself. Our brick is multi-toned and has the odd yellow or green brick thrown in.

After two coats of stain-blocking primer and two coats of the gold, I had a smooth, pretty door frame to match my pretty door. But, of course, that’s not the end of the project.

While I was stripping the paint, I also peeled out most of what I can only call the “World’s Worst Caulking Job” from around the perimeter of the frame. It was like someone outlined the door in puffy paint. Obviously someone didn’t really know what they were doing or care how it looked. I care, so I pulled all of it out.

And guess what I found as insulation? Um… this stuff. I’m guessing it’s some sort of shredded tree bark or some other natural fiber. Old houses are weird.

There was also some “caulk saver” foam shoved in there on top of the fiber. I redistributed the foam and bought some additional foam to fill in some gaps.

Then I caulked all around the frame with this special mortar caulk. I think it does a convincing job of looking like mortar. It’s much rougher than sanded grout even. There must be tiny rocks in it or something. No kidding.

Much better than the bubbly painted mess that was here before. And then I was finally, finally done!

It’s really going to pop once I paint the surface of the porch and get the railing back up. The concrete is cured now, so if we get a few cool days, I’m going to tackle that.


See more curb appeal projects here >>


Wow! Amazing job! I’m considering doing my front door. I am inspired! Better than paying 1200$ to a strange guy I found on the internet. I hope!!!
It’s Wednesday, and it’s supposed to rain on Friday. Should I wait?
Thanks! Glad you found my project!
These types of jobs are just very labor intensive, hence the high price tag. The materials are not expensive.
I’m not sure I would feel comfortable hiring someone to do this. Basically they will be IN your house for several days.
About the rain, I probably would wait if your door isn’t covered and might get wet. The wood will need to be completely dry before you do anything to it.
When I refinished my door, I had to leave the door open for long stretches of time (8 hours) to let the stain/polyurethane cure. Latex paint doesn’t take as long to dry, but you still probably would want to leave the door open as long as possible to let the paint cure.
I’m not sure what kind of temperatures you have where you live right now, but I would probably go scout the products you plan to use and make sure the current temps fit into the range recommended on the label. Many paints, etc. recommend it at least 50 degrees. If it’s too cold, then I would probably wait until spring or summer!
Good luck!
Hi Erin! Thanks for all the tips in this post! I’m repainting my front door frame and searching for help online. I saw you used a primer before you actually painted. Did you use an oil-based primer or water-based primer? I’m having a hard time figuring if it matters at all. I have water-based at home and would like to use that if you think it would work! Any help would be appreciated! Thanks!
Hi! I used a latex stain blocking primer called Kilz Premium. There’s a photo of the can in this post. I have had nothing but good results. If you have old bare wood or previously stained wood, using a stain blocker is a good idea. If you want to use the one you already have, I would verify that it says it can be used on the exterior.
I don’t use oil-based products unless there’s no alternative, so I’m not sure if there would be an advantage. Latex products have come a long way.
Hopefully that helps! Good luck!
Great, thanks for your feedback! I have Bullseye primer at home which is pretty much like the Kilz you suggested. It’s also water-based like the one you have. Cool, I think I’ll go ahead and use it. Thanks so much! Isabel
Nice looking door!
Thanks! It’s one of my favorite features of our house.
I am so grateful to find this!! You have done a fantastic job on the look of your house but what a great service for the rest of us, to have your info and photos, step by step. I am doing a bigger job. The whole entranceway all around and above the door. I’ve been scraping…and scraping. Didn’t want the mess of the chemicals either but…it is getting discouraging! I’m beat! Thank you so much for all of this!!! Nancy
Thanks! I didn’t want to work with the chemical stripper, but it did make things go a lot faster.
Good luck with your project. There’s a big payoff in the end!
Thank you for the post! I’ve been using citristrip for 3 interior door frames and moldings in just one room been scrapping and scrapping but i still see paint! erg. might need to go the chemical route.
Maybe i missed it but in your post, all you said was after several hours the paint was gone.. So not scraping require??
Thank you!
I think those citrus strippers are good if you are stripping like one coat of latex paint. If you are working against oil paint or have many layers, they are pretty useless!
Sorry, I guess that phrase about using the chemical stripper is confusing! I may go back and fix that wording.
You do have to scrape it just like you scrape the citrus stripper. The heavy duty stuff just penetrates the paint better. It’s smelly and will burn your skin, so be careful. But if you are frustrated with the citrus stripper, you will see quicker results with real paint stripper. I would also make sure the citrus stripper has completely evaporated before trying the next one.
Good luck! It’s a messy job!